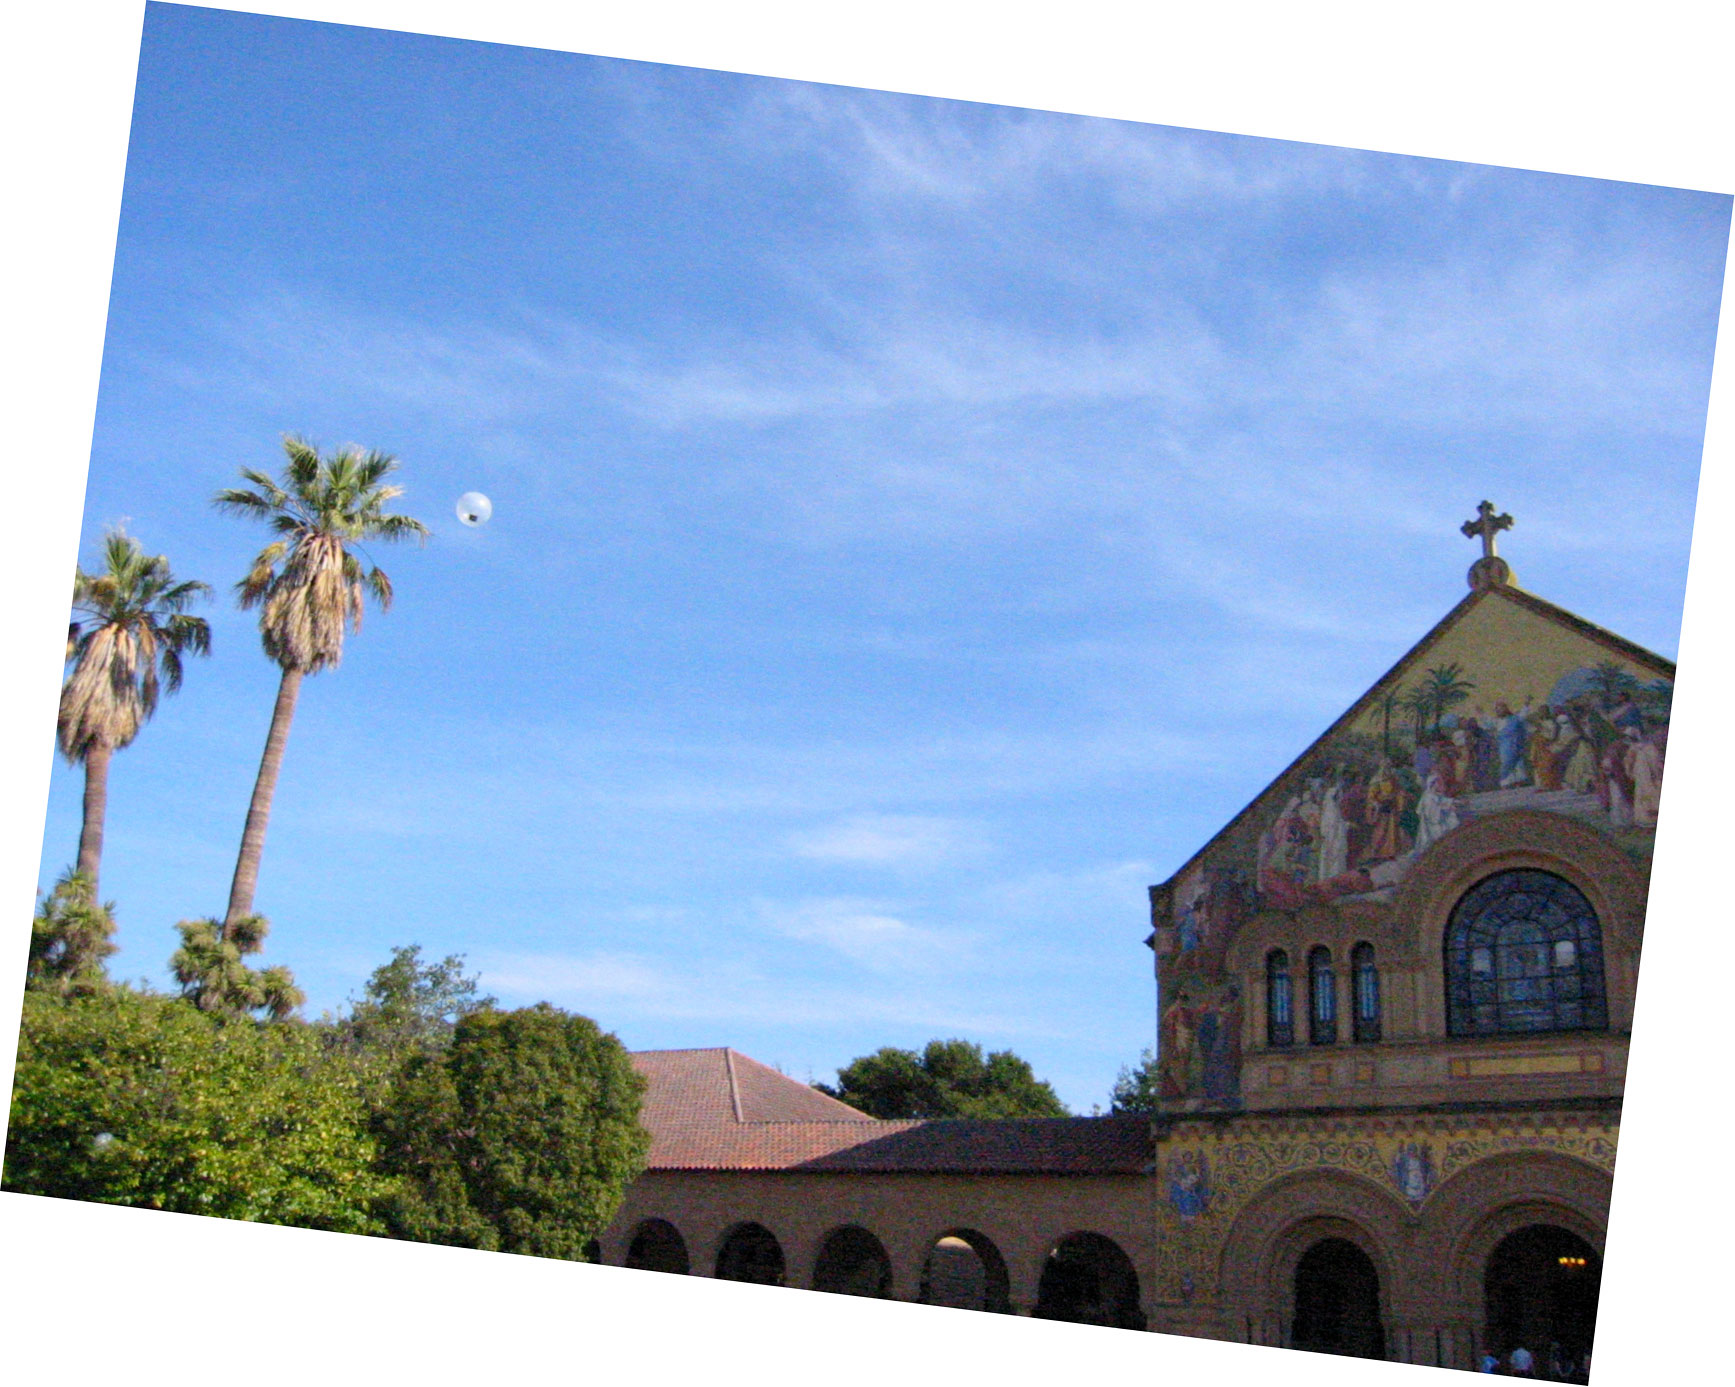
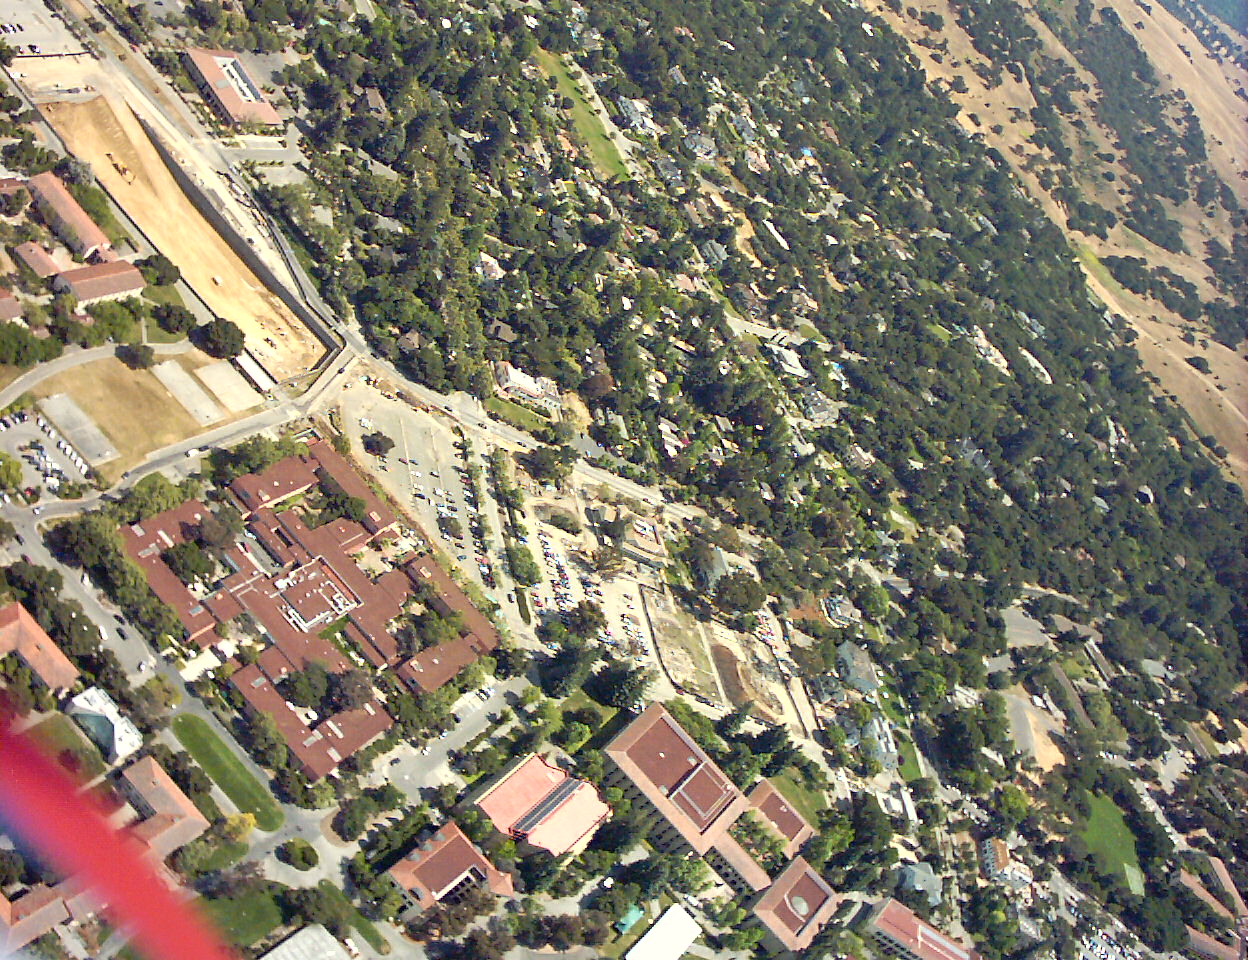
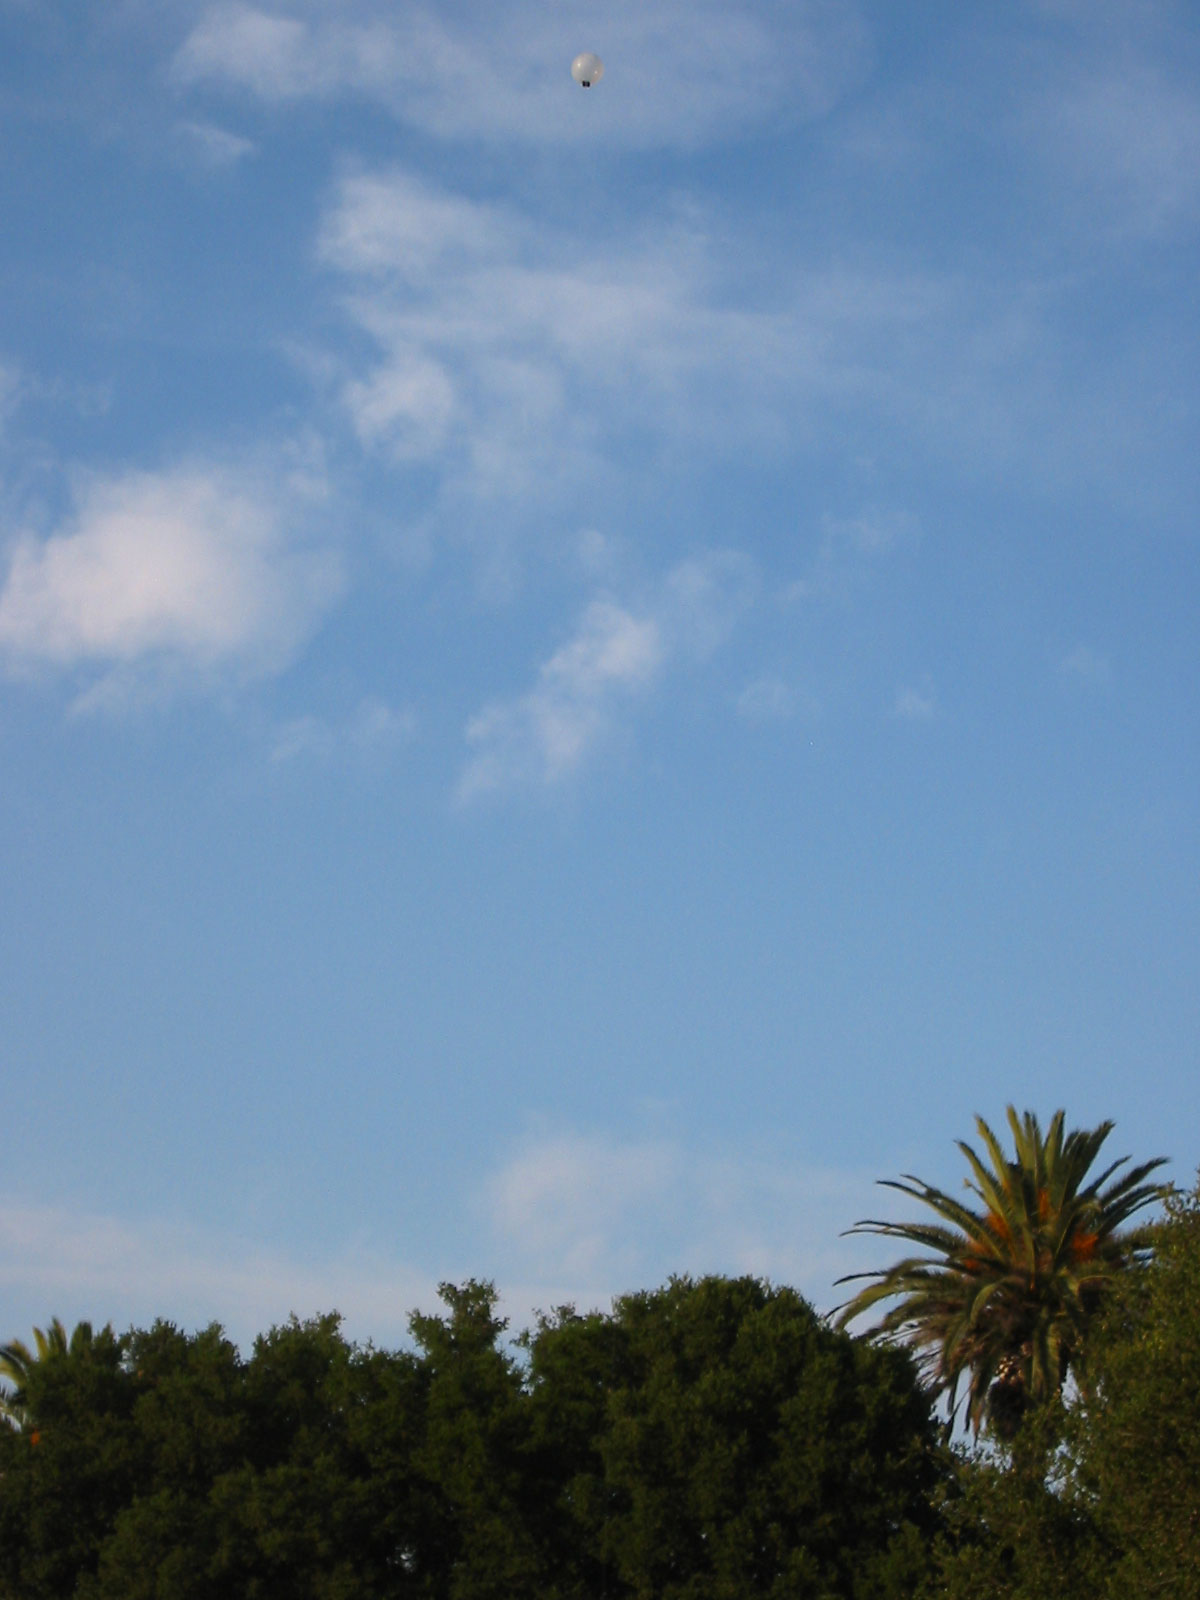
Balloon camera taking pictures over Stanford quad. First non-test flight.
Balloon camera: Aerial photography for $50
Taking photographs from the air is conceptually straightforward. First, you need to choose a camera. Then you need to launch the camera. Lastly you need a way to release the shutter. Here are instructions to do all of these on a $50 budget.
This project dates from 2003, when remote-controlled quadcopters did not exist at all, compact RF receivers did not exist on a practical budget and lightweight cameras had poor lenses and sensors. This project was innovative enough to be featured on Slashdot, when Slashdot was a high-traffic site. Of course there are easier options today.
Launching the camera
There are basically three options to launch the camera within the $50 budget: a balloon, a kite and a rocket.
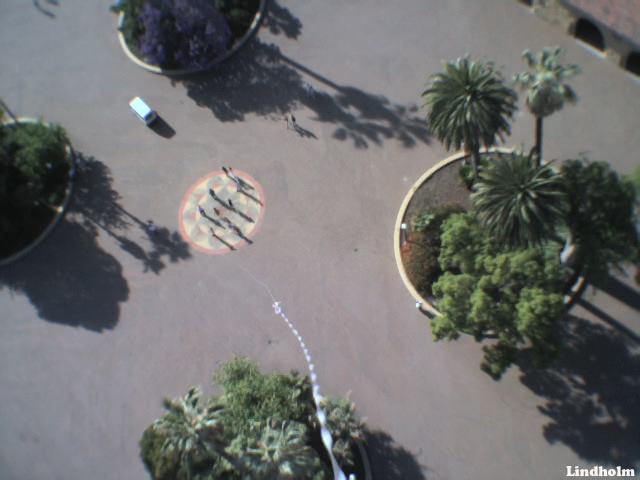
Stanford quad, from balloon camera. First non-test flight.
A kite
Kites are made in sizes large enough to carry practically any camera. For example, archeologists have used kites ten feet wide to take aerial photos of desert sites with frame-mounted 35mm SLR cameras. (For more information, do a Google search for “kite aerial photography.”) With strong, steady wind, a smaller kite and a lightweight camera would work fine for aerial photography. If you want to take pictures near the seashore, this might be the option for you.
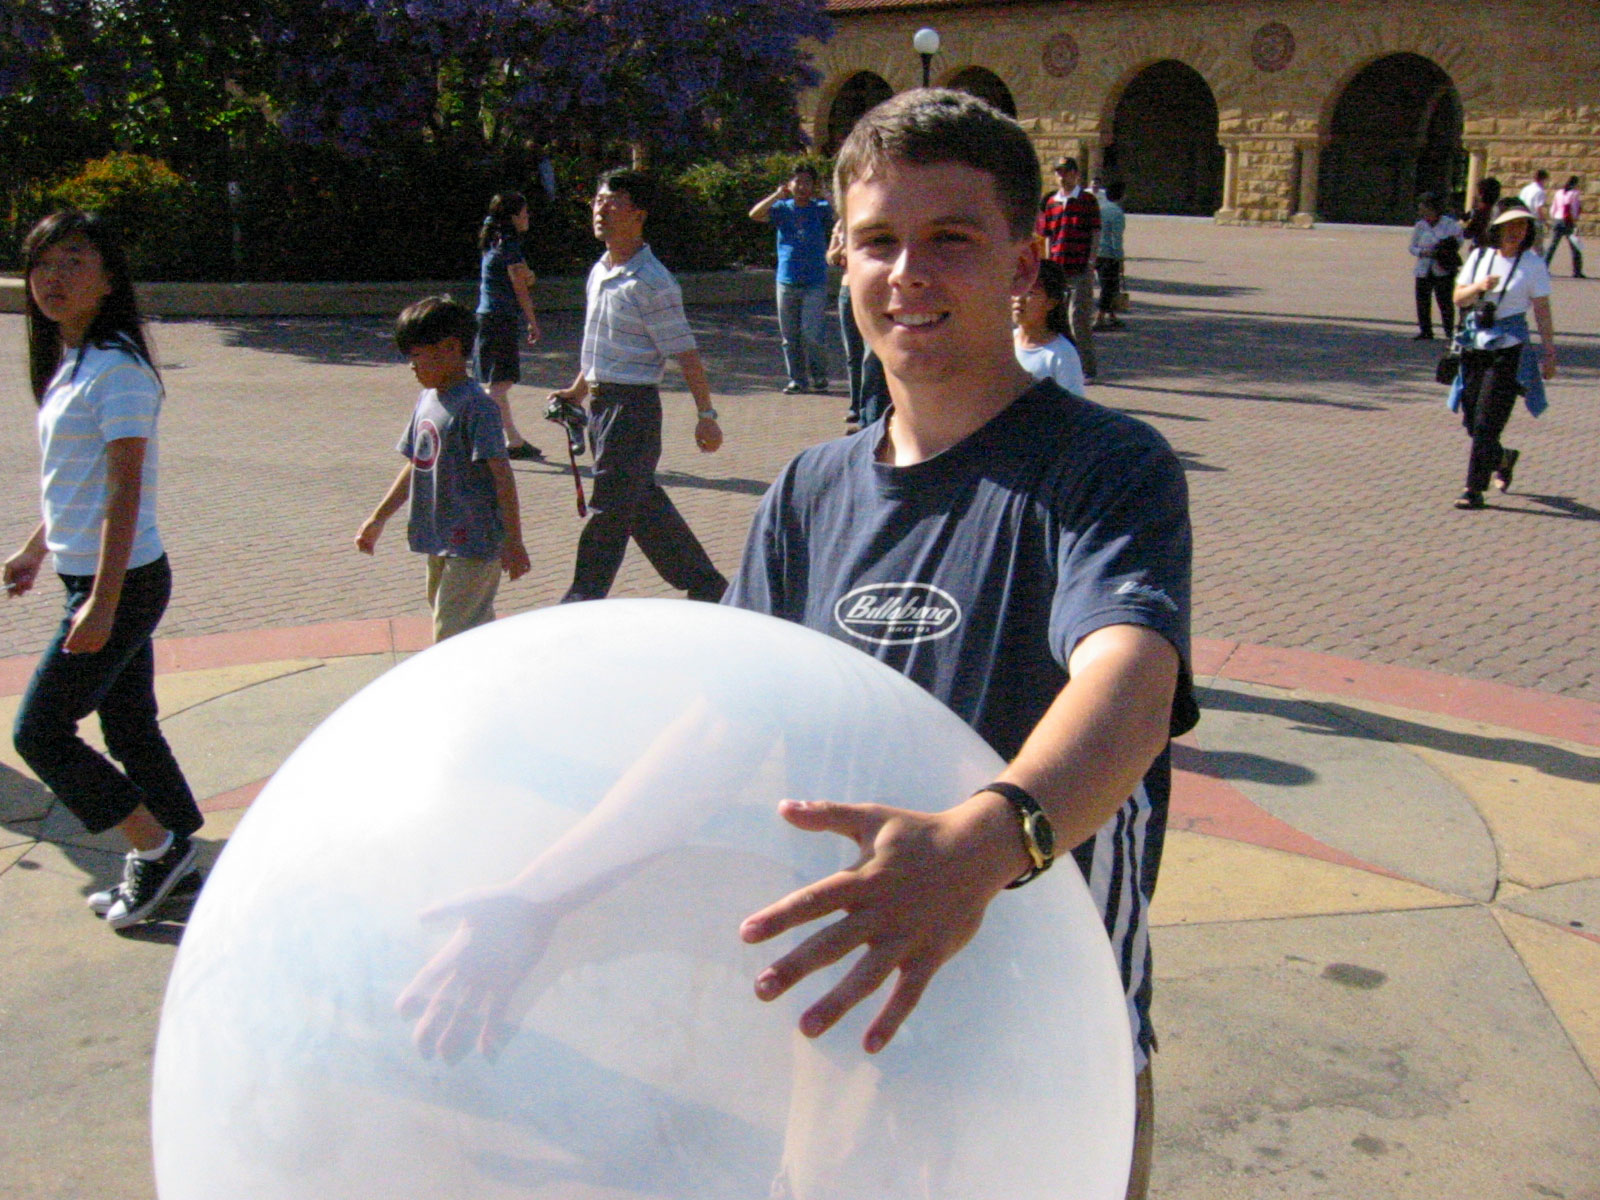
Luke with balloon and camera, ready for launch
A balloon
A tethered helium balloon is a gentler, more reliable way to lift a camera. It works if you don’t have steady wind and it won’t power-dive into the ground. It ascends quickly, which means the line can fully unspool before the limited memory in the camera is filled up with photos. And it’s inexpensive. I used a 40″ party balloon from a party supply store on Veterans Blvd. in Redwood City. It cost $5.95, including helium. I did some quick informal tests, and it appeared that my balloon could lift about eight ounces. One caveat is that the air should be as still as possible if you use a balloon. Wind will ruin the pictures by spinning the balloon, and more importantly you run the risk of the wind pushing the tether into tree branches, roof shingles, etc.
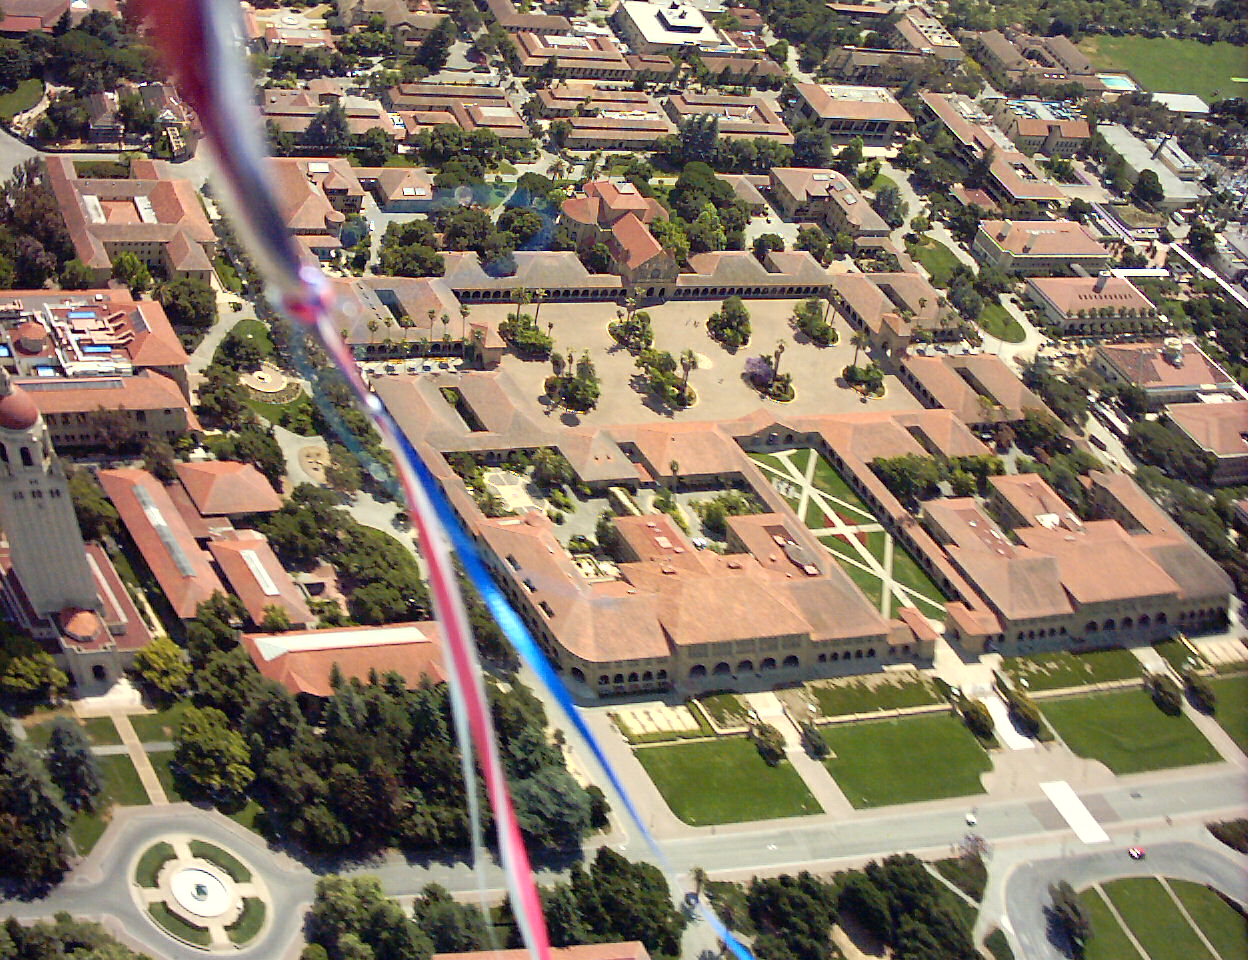
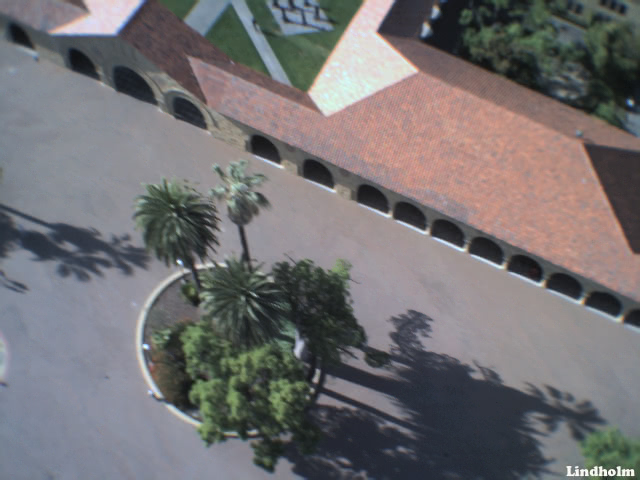
Balloon camera over Stanford oval, using 30-lb monofilament instead of kite string.
For the tether you can either use kite string or monofilament fishing line. I used kite string for most of the pictures on this page. It’s strong and doesn’t tangle much, but it’s heavy and takes a long time to respool. In 2006, I used 900 feet of 30-lb test as a disposable tether, which cost two dollars at Target, and got the more impressive photos you see next to this paragraph. You could use an even longer, lighter line if you want. It is admittedly a little wasteful to only use the line once, but it saves a lot of time and goes higher than kite string. You might be interested to know that the materials used for extreme altitude tethers (used for setting kite altitude world records) are steel and kevlar.
Balloon camera over Stanford oval, using 30-lb monofilament instead of kite string.
What about a rocket?
You can buy an Estes model rocket with a built-in 110 camera which takes a photo at the apogee of flight. It’s cheap and easy to launch. But you only get one photo per launch and “sky” pictures are all too probable. And because model rockets are launched in open fields, even a successful picture is not likely to be an interesting one.
Stanford quad, from balloon camera. First non-test flight.
Choosing the camera
Even the cheapest camera will consume the lion’s share of the budget, and with a party balloon as your launching mechanism, it needs to be as lightweight as possible. I bought a Vivitar 5 keychain camera for $37 at Fry’s Electronics. The downside of this particular camera is that the optics are horrible. If you use a fixed-focus camera you should calibrate the lens for “infinity” focus. You can do this by going to a wide open area, like a parking lot, and taking photos of a building or sign hundreds of feet away. Adjust the camera and repeat until the photo is as clear as possible. It also has limited memory capacity. It can only store 26 photos.
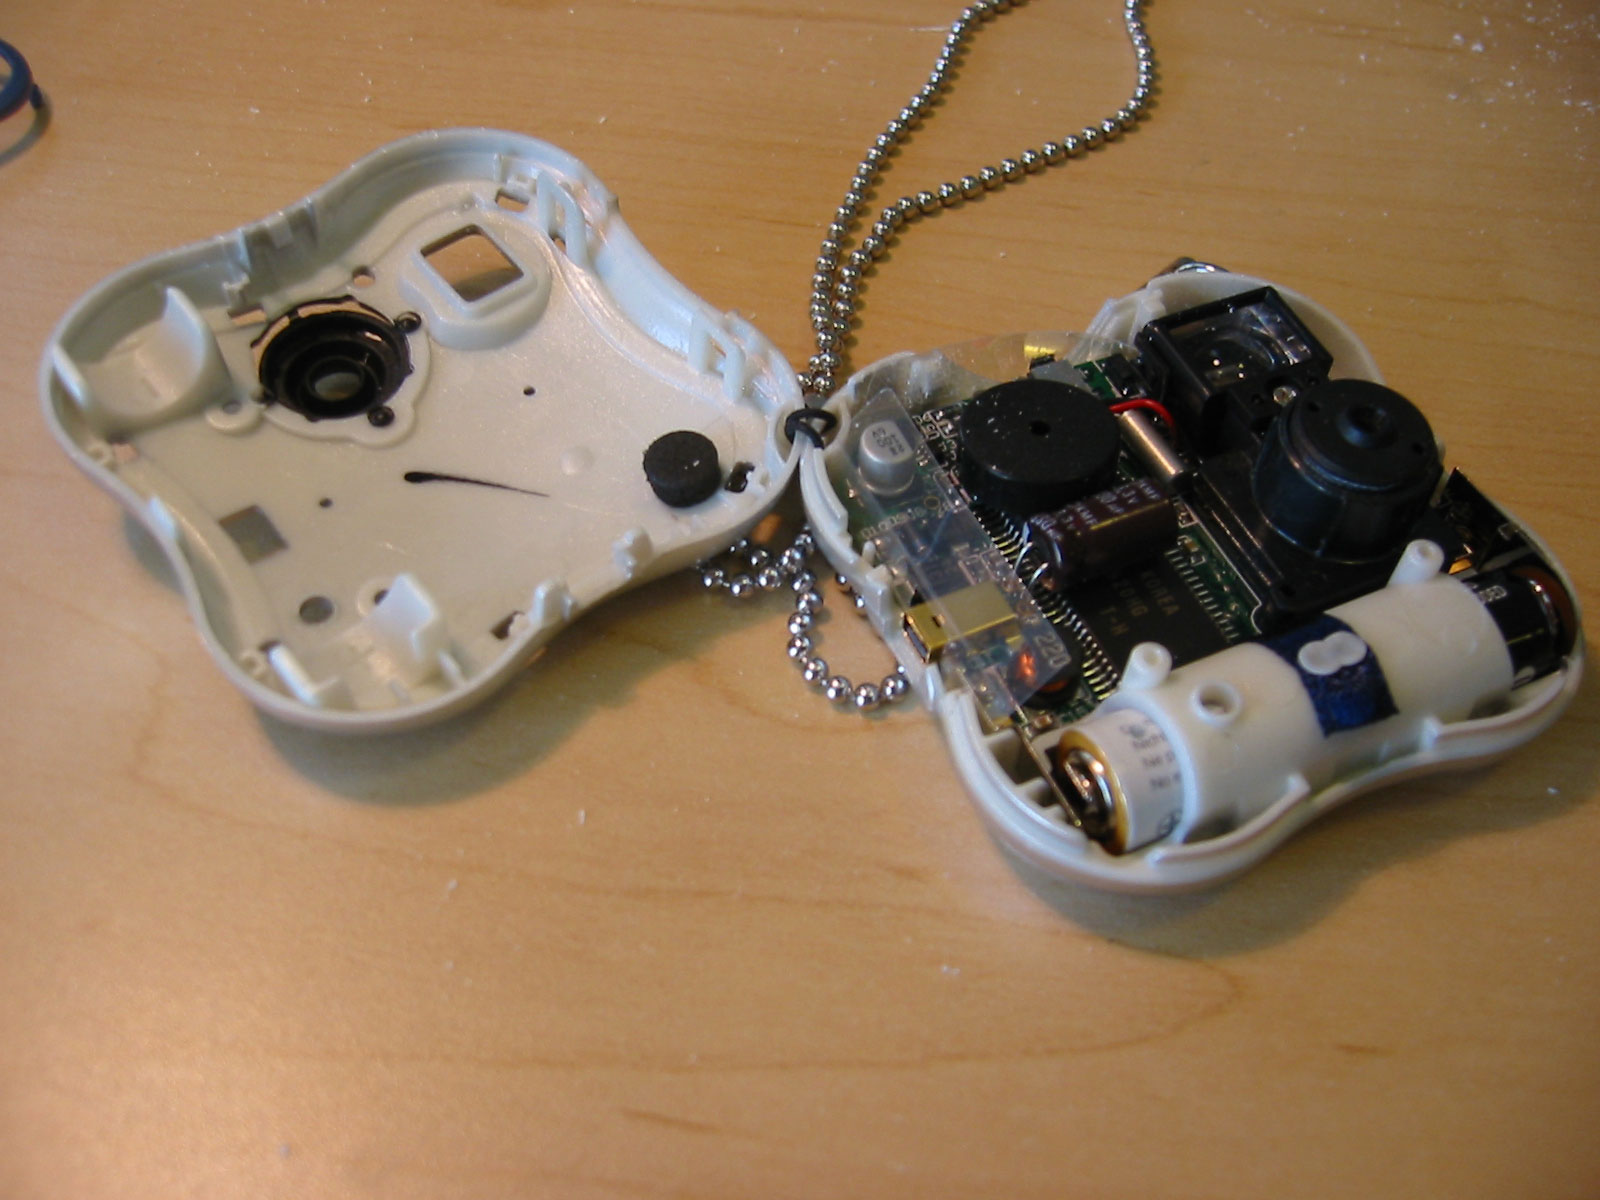
Vivitar keychain camera, before modification
Getting the pictures off the Vivitar 5 was a pain in the ass. It does not have Mac drivers, so I had to use my old Windows 98 SE laptop to download the pictures. The Windows TWAIN photo editor software did not work with the driver. I briefly used a shareware, time-limited program called ACQUIRE until after my balloon camera was featured on Slashdot and someone kindly e-mailed to recommend a free program called TwainTiffBatcher (description) which relies on another free library (description).
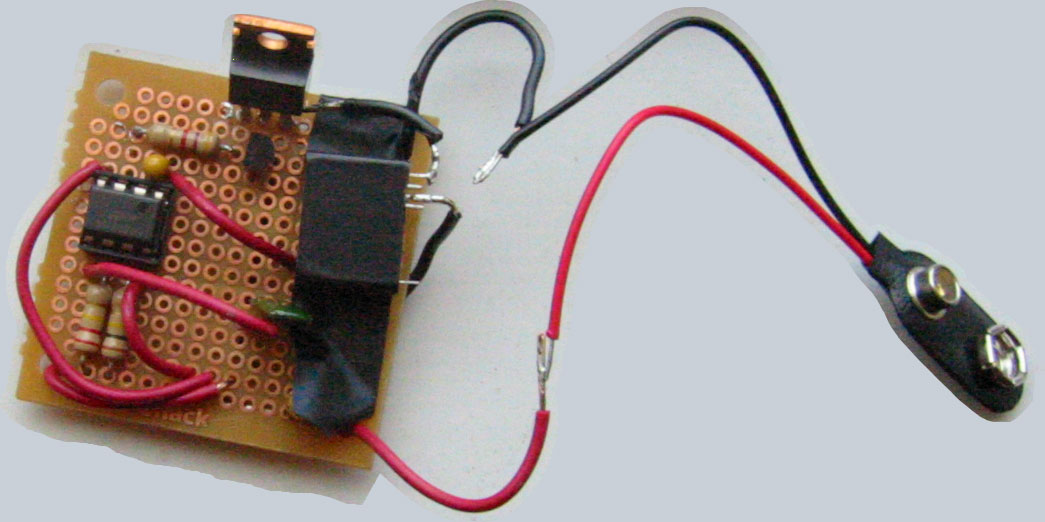
Trigger circuit for balloon camera. Relay and 555 timer, powered by 9-volt battery.
Triggering the camera
If you’re lucky, your digital camera has a built-in interval timer function. For example, at least one Kodak camera has the feature where, if you put the camera into timer mode and hold down the shutter button, it will restart the timer after taking a picture. A camera like this is easy to use with the balloon project: tape a penny over the shutter button and you are good to go. But if you don’t have a camera like this, you will need to wire in an electronically controlled switch to take the photos.
The circuit I made uses a 555 timer chip and a relay to simulate a shutter button press at fixed intervals. Basically, the timer chip sends a pulse every few seconds to the relay. When the relay receives the pulse, it briefly closes a switch. As far as the camera is concerned, there is no difference between the relay’s switch closing and the shutter button being pressed, so the camera takes a photo. Mechanical bounce isn't a problem because the relay is replacing another mechanical switch. You might wonder if you could use a bipolar transistor instead of a relay, and the answer is no due to the voltage drop. A MOSFET would work if you connected the grounds but the relay has the nice characteristic that it makes a clicking sound, so you know that the timer is operating correctly before launching the balloon.
Balloon camera over Stanford quad. First non-test flight.
555 timer
There are several types of 555 chips. Radio Shack sells a TTL version and a CMOS version. The difference for us is that the TTL version consumes more power and can source/sink more power. The relay I chose requires the TTL chip. The interval of the pulses from the 555 is controlled by resistors and capacitors. You might want a shorter interval if you want the camera to take photos at different altitudes. I initially set the timer interval to about four seconds, using a 110k resistor, a 220k resistor, and a 10 μF capacitor. Or you might want a longer interval if your camera has limited memory and you want more pictures at maximum altitude. Because the Vivitar 5 camera I used can only store 26 photos, I changed the interval to about 20 seconds, using a 110k resistor, a 220k resistor, and a 50 μF capacitor. I also used a 10 μF capacitor between the power and ground rails, and a 10 nF capacitor between pin five and the ground rail. Tantalum capacitors are the way to go. They're only two or three times the price of a normal electrolytic capacitor, and they give you a lot more room on the board. They are polarized, though, just like a normal electrolytic, so make sure you put them in the right way.
Battery
The circuit needs a battery. There are three things to consider: the voltage, how much it weighs and how reliable it is.
The relay requires voltage near five volts, and the TTL 555 chip drops the voltage a little. So an ideal battery for the circuit is six volts. Radio Shack sells a six-volt battery that is slightly shorter and wider than an N cell. I bought an N cell holder from Radio Shack and melted the holder to fit the battery with boiling water. Unfortunately, the battery tended to pop out even after being taped down so I abandoned the idea of using a six-volt battery.
A nine-volt battery is very reliable, with a snap-on connector that won’t come loose in flight and can be easily disconnected after landing. The battery is a little heavy—heavier than the camera itself—but still within the weight budget for the balloon. The voltage works fine with the 555 chip, but is too high for the relay. To fix that, I put a five-volt voltage regulator between the 555 chip and the relay.
Wiring instructions
I don't have a neatly written schematic, but it's pretty easy to describe the connections. 10 μF between the power and ground rails, pin 1 to GND, pin 2 both to pin 6 and through C to GND, pin 3 through voltage regulator to relay to GND, pin 4 to Vcc, pin 5 through 10 nF to GND, pin 6 through R2 to pin 7, pin 7 through R1 to Vcc, pin 8 to Vcc. R1 and R2 I picked to be 110k and 220k. C I picked to be 10 μF for fast timing and 50 μF for slow timing.
When you connect the relay to the camera, be careful with ESD and dust. I used pre-cut wire-wrap wire to solder to the switch pads, though magnet wire would also work. As always, remember that soldering reinforces existing physical connections, it doesn't fill gaps.
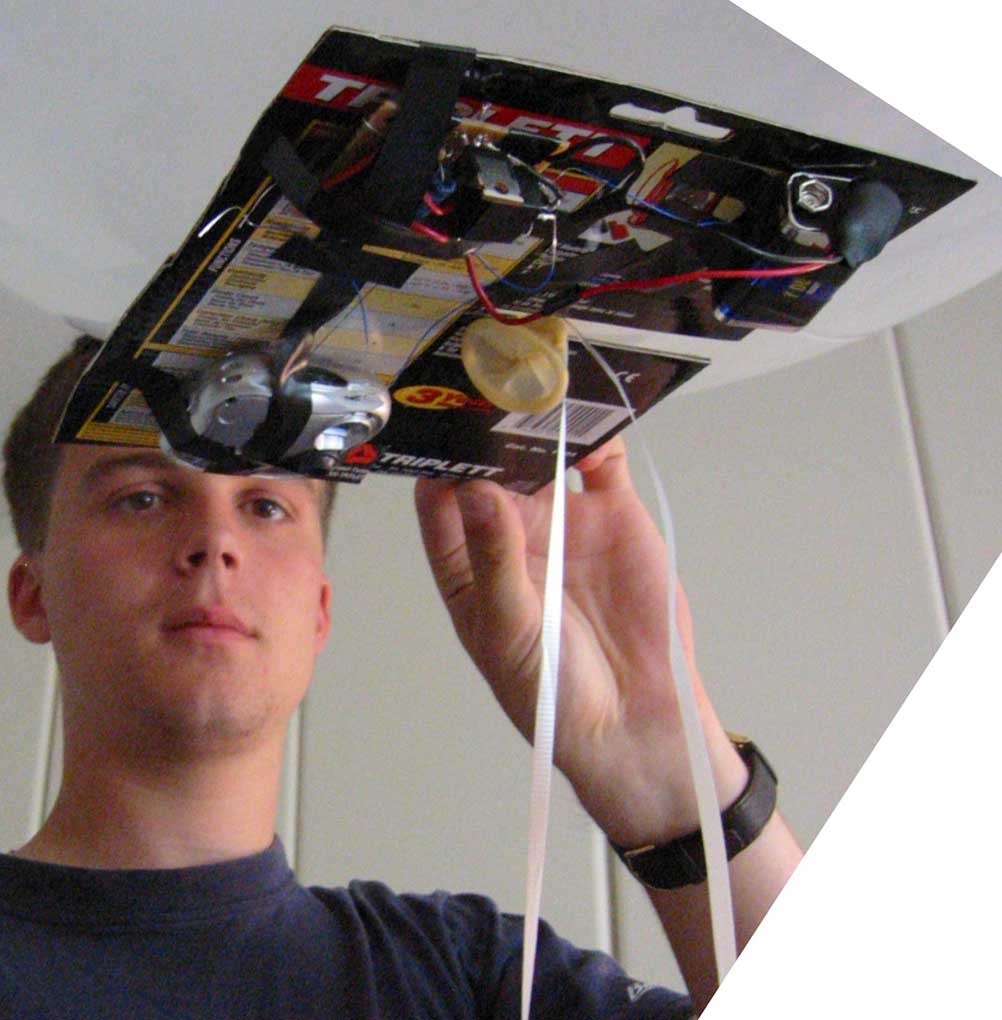
Luke with camera and timer mounted onto balloon. Components distributed to balance the weight.
Mounting the camera to the balloon
To mount the camera and triggering mechanism to the balloon, I taped them to a piece of cardboard with electrical tape. I cut a slot in the cardboard, fit it behind the balloon’s knot, and taped the slot so the cardboard wouldn’t fall.