NSTokenField, Bindings and Core Data
It’s not easy to use NSTokenField and Core Data. Here is a simple example along with a high-level explanation of the example. I assume you have some experience with development on macOS.
Background
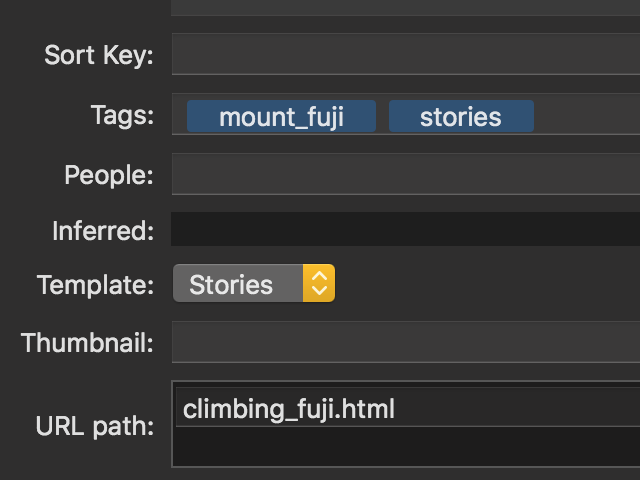
An NSTokenField is similar to a text field, except that the text is transformed into individual colored nuggets, which gives user feedback that the text has been understood. You will commonly see these in the “to” fields of e-mail programs as well as the search box of the macOS Finder.
I’ve written a short example program to show how to connect an NSTokenField to Core Data. It’s a mockup of a photo organizing program, where the NSTokenField is used to “tag” the photos into categories. This example is tested on XCode 11.3.1.
Core Data
In Core Data create a Tag entity with a name string field and a Photo entity with a person string field. Imagine a yearbook, for example: Each photo is of a single person, who is tagged with all of the clubs he or she is in. (To make the example as simple and clear as possible, this example won’t actually store photos.) A photo can have more than one tag, and more than one photo can have the same tag. So add a many-to-many relationship between the entities.
Files to reference: TokenTest.xcdatamodeld
Interface builder
In the view controller scene, drop in an array controller and connect it to the Photo entity. Add a table view with one column and in the table cell view add a text field and a push button. This push button will open up a detail window with the NSTokenField. Set the text field’s value model key path to objectValue.person of the table cell view. Add a button under the table view, label it “+” and set its action to the array controller’s add method. Add autolayout constraints. Set the view controller’s class to ViewController.
Add another window controller, drop in an object controller. Add an NSTokenField and set its value model key path to tags of the object controller. Set its value transformer to ArraySetTagTransformer. Add autolayout constraints. Set the view controller’s class to DetailViewController.
Add a segue from the detail push button to the second window controller. Set it to modal and set its identifier to detailSegue.
In this section I left out routine details. If you have questions about how the array controller should be configured, for example, please look at the storyboard in the example program. One detail that’s worth pointing out is that starting in macOS 10.13, NSTableView is smart enough to figure out its own row height using autolayout, if you enable that setting in “Row Size Style.”
Files to reference: Main.storyboard
Impedance matching
Core Data operates with sets of managed objects, while NSTokenField works with arrays of strings. (Yes “strings” is an oversimplification; see below.) We can convert between the two using a custom-written “value transformer.”
The class ArraySetTagTransformer changes sets of Tag objects into strings by pulling out the name members and putting them into a sorted array. It changes arrays of strings into Tag objects by calling a class method on Tag called findOrInsert which returns an existing Tag with the given name, or if not found makes a new Tag object with that name. Tag.swift defines this class method as an extension on the Tag entity.
In order to use a value transformer, you need to register it very early in the application’s lifetime. We create a file called main.swift, and there we register the value transformer before calling NSApplicationMain. When we provide our own main.swift, we need to remove “@NSApplicationMain” from the top of AppDelegate.swift.
Files to reference: ArraySetTagTransformer.swift, Tag.swift, main.swift, AppDelegate.swift
Core Data glue code
In a real application we would park the Core Data housekeeping methods in their own singleton class. It is considered bad form to use the application delegate as a dumping ground for globals which have nothing to do with NSApplication. But to simplify this example we will follow the Apple Core Data project template which does put the Core Data methods into the application delegate.
In the AppDelegate class, add a lazy var called uiContext which returns the context associated with the main thread. Also change saveAction to saveDocument; this is a typo in the Apple Core Data project template. (The menu item for “Save” looks for a method called saveDocument and if the method names don’t match you won’t be able to save your data.) Someday Apple might actually fix this bug in its template, so if you are using a later version of XCode check the code to be sure.
Next we solve the problem where a user saves a document and finds that edits to the current Cocoa control are silently discarded. Edits in a Cocoa control are not committed (and therefore, not saved) until the control loses first responder status. Therefore, to ensure all data is saved, at the top of saveDocument set the first responder to nil. Sometimes novice programmers are not aware of the reason their data isn’t saving and they try to work around the problem by setting “Continuously Updates Value.” This is generally incorrect and is particularly incorrect when working with NSTokenField. If you entered “foobar” into such an NSTokenField, you would get “f, “fo,” “foo,” “foob,” “fooba” and “foobar” saved into Core Data.
Files to reference: AppDelegate.swift
ViewController
The ViewController class is pretty straightforward. Add an Objective C dynamic var called context which returns uiContext from the application delegate. Add an outlet for the array controller. In the storyboard, set the model key path of the managed object context of the array controller to self.context.
When we segue to the detail window, the object controller there needs to know which Photo to edit. The table cell view’s objectValue is set to that Photo. So add a method in ViewController to prepare for the detailSegue by passing along that information.
For the same reason that we set the first responder to nil before saving, we need to commit edits before a window disappears. So in viewWillDisappear, call commitEditing on the array controller. An array controller (or any object controller) tracks which controls are editing its data and calling commitEditing on that controller is the “proper” way to make sure edits are not lost.
Previously I mentioned that the NSTokenField will keep an array of strings, and we convert to and from a set of Tag objects using a transformer. The reason is that keeping an array of strings allows the user to fix typographical errors without polluting Core Data. For example suppose the user accidentally keys in “piza” but immediately deletes the token and then enters “pizza.” Because Cocoa controls don’t commit edits until the control loses first responder status, and because “piza” was deleted before the control loses first responder status, the value transformer won’t create a Tag object for “piza.” Note that in some situations (e.g., a search box) you would not create a Tag object for an unknown token.
Files to reference: ViewController.swift, Main.storyboard
DetailViewController
The DetailViewController class is also straightforward. Add two outlets for the object controller and token field. Add a member variable instantiating the TagTokenDelegate class and in the viewWillAppear method, make it the token field’s delegate. In viewWillDisappear, call commitEditing on the object controller (for the same reason as in ViewController) and set the token field’s delegate to nil.
Files to reference: DetailController.swift, Main.storyboard
Autocomplete
The TagTokenDelegate class implements autocomplete. Implement tokenField:completionsForSubstring:indexOfToken:indexOfSelectedItem: to determine the completions for the substring. Execute a Core Data fetch for Tag objects with name beginning with the substring, with “[cd]” in the fetch to make the search insensitive to case and diacritics.
To allow users to choose a tag by clicking on the autocomplete list, implement controlTextDidChange. If the application’s current event is a left mouse up, send a key down event to the first responder to simulate the return key being pressed. Note that this will cause a slight inconsistency in behavior. The simulated return key will cause the value transformer to be called, which means that Tag objects will be created. Here is an example. Assume that a Tag object for “foo” does not exist and a Tag object for “bar” does exist.
- Situation 1: User types “foo” and enter, putting a “foo” token into the
NSTokenField. User types “ba” which autocompletes to “bar.” User presses the down arrow and the return key, putting a “bar” token into theNSTokenField. User deletes the “foo” token then closes the window. Result: aTagobject for “foo” is not created. - Situation 2: User types “foo” and enter, putting a “foo” token into the
NSTokenField. User types “ba” which autocompletes to “bar.” User clicks on “bar” with the mouse, putting a “bar” token into theNSTokenField. ATagobject for “foo” is created. User deletes the “foo” token then closes the window. Result: aTagobject for “foo” has been created.
Files to reference: ArraySetTagTransformer.swift, Tag.swift, main.swift, AppDelegate.swift